Here are simple methods to check if your baking soda or baking powder still has power left to make your baked products rise.
To Test Baking Soda:
Stir half a teaspoon or 2.5gm of baking soda into 2 tablespoons or 28 ml of lemon juice or vinegar. If the baking soda is still working it will bubble and fizz, if not then it is the time to buy a new box of baking soda.
To Test Baking Powder:
Stir half a teaspoon or 2.5gm of baking powder into 2 tablespoons of hot water. If the baking powder is still working it will bubble and fizz, if not then it is the time to buy a new box of baking powder.
Tuesday, November 30, 2010
Home Made Baking Powder
If you ever realize that you have run out of baking powder or that the one you have has lost its power, you do no have to rush to the nearest grocery store. You can make your own baking powder at home.
Ingredients:(equivalent of a teaspoon or 5gm)
Baking Soda - 1/2 tsp (2.5 gm)
Cream of Tartar - 1/4 tsp (1.2 gm)
Method of Preparation:
1. Just mix together both the ingredients to get your very own baking powder.
Tip: Both baking soda and Cream of tartar are easily available in most of the grocery stores and both these ingredients keep indefinitely when stored separately. So it is a good idea to have them at hand for any emergencies
Monday, November 29, 2010
No Yeast Yogurt Bread
A bread with no yeast, no oil/butter, one that contains wheat flour and millet flour along with honey and yogurt... Once I saw this recipe, I wanted to try it immediately. The recipe asked for wheatgerm, I didn't have them at home, so I replaced them with flax seeds. The outcome was a moist, wonderfully tasting, healthy and nutritious bread, that goes equally well with sweet or savory accompaniments. I halved the ingredients and made a small loaf (1 cup whole wheat flour and 3/4 cup millet flour, you can use any ratio and I baked for an hour).


Ingredients:(Makes 1 large loaf)
2 or more mixed flours - 31/2 cups (Wheat/rye/barley/millet)
Wheat germ - 3 tbsp
Baking Soda - 2 tsp
Baking Powder - 1 tsp
Plain Yogurt - 1 cup
Skim Milk/Water - 1 cup
Honey - 1/2 cup
Salt - 1 tsp
Method of Preparation:
1. Preheat the oven to 300F. Grease a large loaf pan.
2. Add all the ingredients to a large cool mixing bowl. Mix well.
3. Scrape the mixture into the loaf pan.
4. Bake slowly for about one hour 40 minutes.
5. Cool the no yeast yogurt bread on a wire rack.
Sending this to

 Champa's 'Bake-off' event


2 or more mixed flours - 31/2 cups (Wheat/rye/barley/millet)
Wheat germ - 3 tbsp
Baking Soda - 2 tsp
Baking Powder - 1 tsp
Plain Yogurt - 1 cup
Skim Milk/Water - 1 cup
Honey - 1/2 cup
Salt - 1 tsp
Method of Preparation:
1. Preheat the oven to 300F. Grease a large loaf pan.
2. Add all the ingredients to a large cool mixing bowl. Mix well.
3. Scrape the mixture into the loaf pan.
4. Bake slowly for about one hour 40 minutes.
5. Cool the no yeast yogurt bread on a wire rack.
Sending this to
Champa's 'Bake-off' event
Sunday, November 28, 2010
Cranberry and Coffee Cake
A cake made with whole wheat flour and one that contains only one tablespoon of oil... when I came across this recipe, I just could not stop myself from making this. Today evening, I made this cake for a friend's wedding anniversary. The recipe asked for an electric mixer to beat the eggs, I didn't have one, so I just whisked the eggs by hand. Alas, my cake did not come out spongy, but it tasted yummy. While returning from the friend's house, my dear hubby took me and got me a new electric mixer :), no more struggling with the whisk while beating the eggs.... yayyyy!!!!
 Ingredients:
Large Eggs - 3
Light Brown Sugar - 1/2 cup
Fine Whole Wheat Flour - 2/3 cup
Sunflower Oil - 1 tbsp
Coffee Essence - 1 tsp
Dried Cranberries - 1/3 cup, roughly chopped
Method of Preparation:
1. Preheat the oven to 375F. Lightly grease an 8 or 9 inch cake pan. Line the base of the pan with parchment paper.
2. Whisk the eggs and brown sugar together until pale and fluffy, using an electric mixer. This may take around 10 minutes.
3. Fold in the flour a few spoonfuls at a time. Add the coffee essence and oil. Finally fold in the chopped raspberries.
4. Transfer the prepared mixture immediately to the prepared cake pan and bake in the preheated oven for 20 to 25 minutes or until the cake springs back when pressed lightly and shrinks away from the sides of the pan.
5. Turn the cake out on to a wire rack to cool the cake completely.
6. Decorate the cake with whipped cream or with a mixture of melted chocolate and a little butter. (I used 3 tbsp of chocolate chips, 1/2 tsp butter and a little milk - melted the mixture in a microwave for 10-12 seconds and spread this mixture on top of the cake and added chopped almonds on it)
Sending this recipe to Champa's 'Bake-off' event
Wednesday, November 24, 2010
Vankaya Pullagura (Eggplant Curry)
Pullagura, a telugu word, whose literal translation is 'Tangy Curry', is used in the local dialect in Rayalseema region, Andhra Pradesh. My native district mostly comprises of farmers, who used to work in the farms and grow groundnut/peanuts, sunflower, castor seeds, etc. Since the whole family used to work in the farms, they hardly had time to cook. So, pullagura was a savior for them. They could put all the ingredients for the curry in a pot and boil till they were cooked, then they would use a wooden masher, known as 'pappu gutthi' or 'pappu katti' to slightly mash the curry and finally would add the tempering. These days, hardly anyone is working in the farms, but pullagura is a dish enjoyed by one and all. Pullagura works as an excellent accompaniment with steamed rice or rotis or ragi sangati/sankati or sadda rotte.
 Ingredients:
Eggplants/Brinjal - 6, medium sized, quartered
Onion - 1, medium sized, roughly chopped
Tomatoes - 2, medium sized, roughly chopped
Green Chillies - 10, roughly chopped
Garlic - 4 cloves
Turmeric powder - a large pinch
Tamarind - small lemon sized ball
Salt - As per taste
For the Tempering:
Mustard Seeds - 1/4 tsp
Cumin Seeds - 1/4 tsp
Urad dal/bengal gram - 1/4 tsp
Curry leaves - few
Oil - 1 tsp
Method of Preparation:
1. Add the quartered eggplants, chopped tomatoes, onion, green chillies, turmeric powder, tamarind to a pressure cooker along with 2-3 cups of water and cook for 2-3 whistles or just until the vegetables get cooked.
2. Add the salt, slightly mash the boiled ingredients using a masher or the back of a spatula.
3. Heat oil in a small pan, add mustard seeds, after they splutter, add cumin seeds, bengal gram and curry leaves, fry for 45 seconds and turn off the heat.
4. Add the tempering to the pressure cooker and let the curry simmer for 5-10 minutes.
5. Enjoy the vankaya pullagura with steamed rice or rotis.
Sending this recipe to my own event 'Celebrating Regional Cuisine'

Tuesday, November 23, 2010
Baked Tuna steaks With Spice Rub
My experiments with spice rubs, especially for seafood is a never ending saga. I made a wonderful spice rub for tuna, the other day. I marinated the tuna steaks in olive oil, crushed garlic, lime juice along with the spice rub and then baked them. The result was a wonderfully smelling baked tuna. My hubby dear liked it a lot.

Ingredients:
Tuna Steaks - 2, 4 oz portions
Garlic - 1 large clove, crushed
Lime juice - 1/2 tsp
Olive oil - 2 tbsp
For the Spice Rub:
Oregano - 3/4 tsp
Marjoram - 3/4 tsp
Paprika/Chilli Powder - 1/2 tsp
Peppercorns - 10
Salt - 1/8 tsp
Method of Preparation:
1. Preheat the oven to 350F. Line a baking tray with aluminium foil and grease it lightly.
2. Add the ingredients for the spice rub to a mortar and grind them all using a pestle to a fine powder.(If you like eating spicy, then add whole arbor chillies and grind them, as I did :))
3. Place the tuna steaks in a glass or non reactive bowl. Add the spice mix, olive oil, crushed garlic, lime juice and mix well using your hands or alternatively, you can add all the ingredients to a ziploc bag and mix well.
4. Cover the bowl with a lid or plastic wrap and marinate the fish for 2 hours.
5. Place the marinated fish on the baking tray, and bake for 14-15 minutes or until you can easily flake the fish using a fork.
6. Enjoy the baked tuna steaks with spice rub while it is warm.
Monday, November 22, 2010
Baked Turnip Greens
Turnips greens contain almost four times the amount of calcium present in cabbage. This week I got a very big bunch of fresh turnip greens. I was thinking of a best way of cooking these greens, without loosing much of the nutrients. Finally it occurred to me that, I could bake the turnip greens in a sealed aluminium foil packet. Bingo, this worked perfectly. I mixed olive oil, salt, chilli flakes, garlic, peanut powder, onion with sliced turnips greens and baked them for 20 minutes. The greens were perfectly cooked through and there were no extra utensils to wash too :)
 Ingredients:
Turnips greens - 3 cups, washed, drained, sliced
Onion - 1 medium sized, roughly chopped
Chilli Powder - 1/4 tsp
Garlic - 1 clove, minced
Roasted Peanut Powder - 3 tbsp
Olive Oil - 11/2 tbsp
Lime Juice - 1/2 tsp
Salt - As per taste


2. In a mixing bowl, add all the ingredients and toss well or use a spatula/hand to mix well.
3. Take a rectangular piece of aluminium foil, spread a little olive oil in the center of the foil.
4. Place the greens mixture in the center of the foil and fold the foil over, seal the edges of the foil, by folding them over. You should finally have a sealed packet, through which no steam can escape. You can even refer to my previous post - cooking using a foil to see how to make a packet using aluminium foil
5. Place this packet on a baking tray and bake for 15-20 minutes. Let the packet rest in the oven for 5 minutes after turning off the oven. If you prefer crunchy greens, then bake for around 12-14 minutes and do not give any rest time.
6. Be careful while opening the hot packet, hot steam might burn your fingers.
7. Enjoy the baked turnip greens as a side with baked fish/meat or with steamed rice and rotis.
Linking this recipe to

Turnips greens - 3 cups, washed, drained, sliced
Onion - 1 medium sized, roughly chopped
Chilli Powder - 1/4 tsp
Garlic - 1 clove, minced
Roasted Peanut Powder - 3 tbsp
Olive Oil - 11/2 tbsp
Lime Juice - 1/2 tsp
Salt - As per taste


Method of Preparation:
1. Preheat the oven to 350F.2. In a mixing bowl, add all the ingredients and toss well or use a spatula/hand to mix well.
3. Take a rectangular piece of aluminium foil, spread a little olive oil in the center of the foil.
4. Place the greens mixture in the center of the foil and fold the foil over, seal the edges of the foil, by folding them over. You should finally have a sealed packet, through which no steam can escape. You can even refer to my previous post - cooking using a foil to see how to make a packet using aluminium foil
5. Place this packet on a baking tray and bake for 15-20 minutes. Let the packet rest in the oven for 5 minutes after turning off the oven. If you prefer crunchy greens, then bake for around 12-14 minutes and do not give any rest time.
6. Be careful while opening the hot packet, hot steam might burn your fingers.
7. Enjoy the baked turnip greens as a side with baked fish/meat or with steamed rice and rotis.
Linking this recipe to
Sunday, November 21, 2010
Broiled Pineapple
Are you looking for a quick hot dessert? If you love pineapple, I am sure you will love this. A very quick, simple and tasty dessert.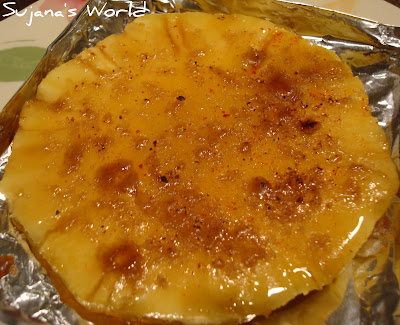

Ingredients:
Sliced Pineapples - 2
Brown Sugar - 2 tsp
Salt - a pinch (optional)
Chilli Powder - a pinch (optional)
Method of Preparation:
1. Line a broiler safe baking tray with aluminium foil and put the oven in broil mode.
2. Place the pineapple slices on the baking sheet, sprinkle a teaspoon of brown sugar on each slice.
3. If using salt and chilli powder, sprinkle very little on each slice.
4. Put the baking tray under the broiler and broil the pineapple slices for 8-10 minutes or just until the sugar starts caramelizing and turns bubbly.
5. If you prefer a little more broiled pineapple, you can first broil the pineapple on either sides for 7-8 minutes, then sprinkle with sugar and broil for 2-3 minutes.
6. Enjoy the warm, succulent broiled pineapple, just like that or topped with a scoop of your favorite ice cream.
Saturday, November 20, 2010
Simple Tindora Fry
Today my dearest hubby came back from a 2 week long business trip :). He loves dondakaya/tindora, so I made a very simple side dish using tindora. The dish was an excellent side dish with palak methi pappu. 

Ingredients:
Tindora/Dondakaya - 2 cups, sliced length wise
Ginger Garlic Paste - 1/4 tsp
Turmeric Powder - a pinch
Chilli Powder - 1/2 tsp
Oil - 1 tbsp
Cumin Seeds - 1/4 tsp
Mustard Seeds - 1/4 tsp
Salt - As per taste
Method of Preparation:
1. Heat oil in a non stick pan. Add mustard seeds, after they splutter add cumin seeds. Then add the chopped tindora/dondakaya, tuermeric powder and mix well.
2. Cook covered on medium heat for 7-10 minutes. Stir in between.
3. Add ginger garlic paste, chilli powder and salt, mix well, sprinkle a little water, if required. Cook covered for another 8-10 minutes, stirring in between.
4. After the tindora is cooked through, cook uncovered for 5-8 minutes. Take off heat.
5. Serve the tasty simple tindora fry with hot steamed rice.
Friday, November 19, 2010
Tomato Soup With Oats
I have a sore jaw, thanks to my wisdom tooth which instead of growing vertically up, is growing horizontally and is pushing against my teeth. Today I am not even able to eat. So, thought of making a soup which will be fulfilling. I used oats as a filler and made a tomato soup. Didn't really do anything fancy, kept it pretty simple.
 Ingredients:
Tomato Puree - 11/2 cups
Oats - 3 tbsp
Vegetable stock/water - 1 cup
Chilli Powder - a large pinch
Pepper Powder - 1/4 tsp
Dried Basil - 1/2 tsp
Olive oil - 1/2 tsp
Garlic - 1 clove, finely chopped
Salt - As per taste
Method of Preparation:
1. Heat oil in a pan and add chopped garlic. Fry for a minute, and add oats to it.
2. Fry for 2 minutes, add the tomato puree, vegetable stock/water, chilli powder, salt and let it boil.
3. Add basil, pepper powder and let the soup simmer for couple of minutes.
4. Enjoy the hot tomato soup with oats.
Linking this to
Thursday, November 18, 2010
Methi Lima Beans Pulav
Today I made a quick methi lima beans pulav and paired it with onion mint raitha. I had got frozen methi and lima beans sitting in my freezer for quite some time now. I paired both of them and made this yummy one pot meal.
 Ingredients:
Basmati Rice - 2 cups, washed and drained
Fenugreek/Methi leaves - 1/2 cup
Lima Beans - 1/4 cup
Green Chillies - 6
Ginger - 1 inch piece
Garlic - 1 large clove
Whole Cardamom - 2
Cloves - 3
Cinnamon - 1 inch stick
Oil/Ghee - 11/2 tbsp
Water - 31/2 cups
Salt - As per taste
Method of Preparation:
1. If using frozen lima beans and methi, thaw them before using. Squeeze excess water from the thawed methi leaves. Grind together green chillies, ginger and garlic into a paste.
2. Heat oil/ghee in a vessel and add the whole spices - cardamom, cloves, cinnamon to it. Fry for 45 seconds and add the ground green chilli ginger garlic paste and fry for a minute.
3. Add the methi leaves, lima beans and fry for 2-3 minutes.
4. Add salt and drained rice to the vessel and mix well. Add water, mix well and cook on medium heat till it starts boiling. Turn down the heat to low and cook covered till the rice is cooked.
5. Serve the methi lima beans pulav with raitha.
Wednesday, November 17, 2010
Kobbari Podi
Kobbari is the telugu word for coconut. Kobbari podi is a wonderfully smelling and equally tasty coconut powder, which is great with chapathi/rotis. The other day, when I saw Gayathri's post, in which she made a coconut powder, I got reminded of this kobbari podi which my granny and mom make as a quick accompaniment for chapathis/rotis. My granny would traditionally grind this kobbari podi using a big mortar and pestle.

 Ingredients:
Dry coconut - 1/4 cup
Green Chillies - 4, roughly chopped (as per taste)
Garlic - 1, small clove
Onion - 1 tbsp, finely chopped
Salt - As per taste
Method of Preparation:
1. Add the garlic, salt and green chillies to a grinder and grind them.
2. Add the dry coconut to it and grind to a fine powder. (If using dry shredded coconut, just pulse once or twice and mix the whole mixture using a spoon).
3. Adjust the salt and mix in the chopped onion.
4. Enjoy the simple, yummy kobbari podi with hot chapathis/rotis.
Tuesday, November 16, 2010
Wheat Jowar Flour Burfi
Today I wanted to eat something sweet. Since my better half is on a business trip, I did not want to bake anything. After thinking for a while, it occurred to me that my mom used to make gulpafti/wheat flour burfi, which used to be melt in the mouth type. She used very little ghee/clarified butter to make it. I wanted to experiment with it and decided to add Jowar/Sorghum flour to it. I made a small batch of this burfi and it came out very well. Best part of the whole thing was, I used just a teaspoon of ghee to make it.
 Ingredients:
Whole wheat flour - 1/2 cup
Jowar flour - 1/4 cup
Jaggery/Brown sugar - 1/4 cup, firmly packed
Ghee/Clarified butter - 1 tsp + a little to grease the plate or dish
Water - 2tbsp
Milk - 5 tbsp
Broken Cashews - few(optional)
Method of Preparation:
1. Heat a small non stick pan and add ghee to it. Then add the finely chopped/grated jaggery to it and let it melt on low heat.
2. Meanwhile heat a pan and add the wheat flour and jowar flour to it. Mix well so that both the flours get mixed with each other. Fry on medium heat till it turns golden brown.
3. Add water to the melted jaggery and mix well and let it simmer on very low heat.
4. Add the hot flour mixture to the jaggery pan and switch off the heat. Mix well using a spatula until the while mixture turns into a jaggery flour crumble. Now add the milk, mix well and put the pan back on low heat.
5. The mixture forms a smooth dough, now mix it continuously using a spatula for a minute or two, once the raw smell disappears, take off heat and transfer the burfi mixture to a greased plate or dish.
6. Using the back of a spoon/spatula, flatten the burfi evenly.
7. After 2 minutes, use a knife to cut pieces of burfi. Press cashew pieces on each burfi.
8. Carefully take out the wheat jowar flour burfi pieces onto another plate and let them cool down completely.
9. Enjoy the wheat jowar flour burfi.
Monday, November 15, 2010
Chayote Moong Dal Curry
Chayote/Chow Chow/Bangalore Vankaya/Seema Vankaya, is available through out the year, here in US. Chayote which has very mild flavor of its own works wonders when combined with ingredients such as cumin, chillies and garlic. Today, I made a chayote curry with coarsely ground moong dal/split bean and it came out very well.
 Ingredients:
Chayote - 1, peeled, deseeded and finely diced
Moong Dal/Split Bean - 1/4 cup, soak in warm water for 2 hrs
Green Chillies - 5, roughly chopped
Cumin Seeds - 1/2 tsp
Garlic - 1 large clove, roughly chopped
Tomato - 1 medium sized, finely chopped
Turmeric Powder - a pinch
Mustard Seeds - 1/4 tsp
Oil - 1 tbsp
Salt - As per taste
Method of Preparation:
1. Drain the water from the moong dal. Add green chillies, cumin, garlic to a grinder and grind to a fine paste. Then add the moong dal and grind to a coarse mixture.
2. Heat oil in a pan and add mustard seeds. Add the diced chayote after mustard seeds splutter. Cook covered for few minutes or until chayote is half cooked.
3. Add the ground moong dal paste to the pan and mix well, removing lumps, if any.
4. Cook uncovered for 2-3 minutes on medium heat. Add salt, turmeric powder, chopped tomatoes and mix well.
5. Sprinkle a little water and cook covered till the tomatoes become soft. Add more water to get the desired consistency.
6. Adjust the salt and enjoy the chayote moong dal curry with steamed rice or rotis.
Sunday, November 14, 2010
Curry Powder For Stir Fries
This is a family recipe of my aunt, Indu. Thanks to her for sharing it with me and giving a chance to share with the whole world. This curry powder is mainly used to enhance the flavor of stir fries, like potato stir fry, tindora fry, capsicum/bell pepper fry, capsicum potato fry and a lot of various such combinations. All you need to add is the curry powder or the koora karam (telugu word) and salt to the dish. When I visited my aunt this year, I fell in love with this curry powder. It added a lot of flavor to the regular stir fries.
 Ingredients:
Chana Dal/Senagapappu - 4 tbsp
Urad Dal/Uddipappu - 2 tbsp
Coriander Seeds/Dhaniyalu - 2 tbsp
Cumin Seeds/Jeelakarra - 1 tsp
Dry Red Chillies - 7-9(As per your taste)
Mustard Seeds/Avalu - 1/4 tsp
Fenugreek Seeds/Menthulu - a large pinch
Curry Leaves - 5-8

Method of Preparation:
1. Dry roast the ingredients individually and let them cool.
2. Add curry leaves and red chillies to a grinder and grind them first.
3. Then add the rest of ingredients and grind to a coarse powder.
4. Store the curry powder for stir fries in an air tight container.
5. Use a spoonful of this curry powder when you make your stir fries.
Usage: Heat oil in a pan and add the chopped vegetables of your choice(Potato/Capsicum/Tindora), cook them until they are 3/4th done. Then add this curry powder, salt, mix and cook for 2-3 minutes or till the vegetables are completely cooked through. Enjoy the tasty, flavorful stir fry.
Saturday, November 13, 2010
Masoor Dal Cabbage Curry
Earlier I had posted Tomato Cabbage recipe, which was super yummy. Today I wanted to make something different with cabbage. Long back I had bought a packet of whole masoor dal, which I hadn't even opened yet. I wanted to try a combination of masoor dal with cabbage and tomato. I had fresh ginger and I used it flavor the curry. The ultimate dish was super tasty and yummy.
 Ingredients:
Cabbage - 2 cups, finely chopped
Whole masoor dal /lentils - 1/4 cup
Tomato - 1, medium sized, finely chopped
Onion - 1, small, roughly chopped
Green chillies - 5, finely chopped
Garlic - 2 cloves, finely chopped
Ginger - 1/4 tsp, finely chopped
Cumin Seeds - 1/4 tsp
Mustard Seeds - 1/2 tsp
Turmeric Powder - a pinch
Oil - 1 tbsp
Salt - As per taste
Method of Preparation
1. Add masoor dal to a vessel along with 2-3 cups of water, a pinch of salt and cook covered on medium heat for 15 minutes or until the dal gets cooked. Drain the water and keep the cooked masoor dal aside.
2. Heat oil in a pan, add mustard seeds, after they splutter, add cumin seeds, fry for a few seconds and add the chopped garlic. Fry for 20 seconds.
3. Add the chopped onion, chillies, turmeric powder and cabbage to it, mix well, add salt and cook covered for 5-8 minutes. Sprinkle a little water, if needed.
4. Stir in between, add the chopped tomatoes, cooked masoor dal and mix well. Cover the lid and let the tomatoes cook, will take around 5-8 minutes.
5. Adjust the salt, add the chopped ginger, mix well and cook covered for 4 more minutes.
6. Enjoy the masoor dal cabbage with steamed rice or rotis.
Friday, November 12, 2010
Banana Peppers Tomato Chutney
Today I wanted to experiment with banana peppers and thought a lot. Finally, I wanted to see how well they would work as chutney. With the ingredients available in my pantry, I made this banana peppers tomato chutney and it tasted quite good. Will definitely make this recipe again using red ripe tomatoes, which will give a good color to it.


Ingredients:
Banana Peppers - 4, deseeded, roughly chopped
Tomato - 1, medium sized, roughly chopped
Green Chillies - 4, roughly chopped
Garlic - 2 cloves, chopped
Bengal Gram/Urad Dal - 1 tbsp
Tamarind - small marble sized
Oil - 1tbsp
Salt - As per taste
For the Tempering:
Oil - 1 tbsp
Mustard Seeds - 1/2 tsp
Cumin Seeds - 1/4 tsp
Curry leaves - few, roughly chopped
Method of Preparation:
1. Heat oil in a pan and add urad dal, garlic and green chillies. Fry for 2 minutes, remove from pan and keep aside.
2. In the same pan add the chopped banana peppers and fry for 2 minutes on high heat. Cook covered for 3 minutes, stir in between.
3. Add the chopped tomatoes to the pan and cook till the raw smell disappears or the tomatoes become soft.
4. Turn off the heat and let this mixture cool down.
5. Meanwhile, add a little warm water to the tamarind and keep it for 10 minutes.
6. Add the urad dal, garlic and green chillies mixture to a grinder and grind it roughly. Add the soaked tamarind, banana peppers tomato mixture, salt and grind it to a smooth paste. If required, add the water used to soak the tamarind.
7. Adjust the salt and heat oil in a small pan. Add mustard seeds, after they splutter add cumin seeds and chopped curry leaves. fry for few seconds and turn off heat.
8. Add the tempering to the banana peppers tomato chutney and enjoy with steamed rice.
Thursday, November 11, 2010
Jowar Onion Rotti
Today I was feeling very hungry and wanted to make something quick, that would satisfy my hunger. Few days back, when I was speaking to my mom, I told her that I had bought jowar flour/jonna pindi. She had then told me that I could make a rotte/roti with it, similar to akki rotte. I quickly chopped onion, chillies and cilantro. Added salt, cumin seeds, sesame seeds and jowar flour, binded them altogether with warm water and made jowar onion rotti. I just loved it, the rotti was so tasty, I quickly took couple of pictures and attacked it. It was so yummy that, it didn't even need any accompaniment like chutney/pickle.
Sorghum/Jawar/Jonnalu are the various names that I know, for Jowar.

Ingredients:
 Jowar Flour - 2 cups
Onion - 1, finely chopped
Green Chillies - 5, finely chopped
Cilantro/Coriander leaves - 1 tbsp, finely chopped
Cumin Seeds - 1/4 tsp
Sesame Seeds - 1/4 tsp
Oil - 2 tbsp
Salt - As per taste
 Method of Preparation:
1. Add all the ingredients to a mixing bowl, mix well using your hand.
2. Take 11/2 cups of warm water and by adding it in little portions, make a soft dough. Since the jowar flour has no gluten, you might have to add a little more water and knead it for couple of minutes.
3. You can make the jowar onion rotti either on an oiled plastic sheet or directly on the tava/non stick pan.
4. If you make them directly on the pan, then add a little oil to the pan, spread it on the whole pan and then place a small dough ball in the center and flatten it out using your fingers of the hand. Poke few holes in the center, using your finger.
5. Now switch on the heat to medium high and place the pan on it. Let it cook for 2 minutes, then place a lid on the pan and cook for 3 more minutes, take off the lid, increase the heat and let it become crisp on the bottom side, it takes around 2-3 minutes. Now flip the rotti gently on to the other side and let it cook for 4-5 minutes.
6. Enjoy the tasty jowar onion rotti with an accompaniment of your choice.
Sorghum/Jawar/Jonnalu are the various names that I know, for Jowar.

Ingredients:

Onion - 1, finely chopped
Green Chillies - 5, finely chopped
Cilantro/Coriander leaves - 1 tbsp, finely chopped
Cumin Seeds - 1/4 tsp
Sesame Seeds - 1/4 tsp
Oil - 2 tbsp
Salt - As per taste

1. Add all the ingredients to a mixing bowl, mix well using your hand.
2. Take 11/2 cups of warm water and by adding it in little portions, make a soft dough. Since the jowar flour has no gluten, you might have to add a little more water and knead it for couple of minutes.
3. You can make the jowar onion rotti either on an oiled plastic sheet or directly on the tava/non stick pan.
4. If you make them directly on the pan, then add a little oil to the pan, spread it on the whole pan and then place a small dough ball in the center and flatten it out using your fingers of the hand. Poke few holes in the center, using your finger.
5. Now switch on the heat to medium high and place the pan on it. Let it cook for 2 minutes, then place a lid on the pan and cook for 3 more minutes, take off the lid, increase the heat and let it become crisp on the bottom side, it takes around 2-3 minutes. Now flip the rotti gently on to the other side and let it cook for 4-5 minutes.
6. Enjoy the tasty jowar onion rotti with an accompaniment of your choice.
Wednesday, November 10, 2010
Banana Peppers Tomato Curry
We got a bag of fresh banana peppers for very less price, when we went grocery shopping. So, I have been thinking of new ways to use banana peppers. Usually banana peppers are used to make mirchi bajji/stir fry. Today I combined banana peppers with tomato and the result was a quick tasty curry.
 Ingredients:
Banana Peppers - 5, deseeded, chopped
Onion - 1, medium sized, roughly chopped
Tomato - 1 large, roughly chopped
Rasam Powder - 1/2 tsp
Chilli Powder - 1/4 tsp
Mustard Seeds - 1/2 tsp
Cumin Seeds - 1/4 tsp
Oil - 1 tbsp
Salt - As per taste
Method of Preparation:
1. Heat oil in a pan and add mustard seeds, after they splutter, add cumin seeds and chopped onions. Fry till the onions become transparent.
2. Add the chopped banana peppers and fry for 2 minutes.
3. Add the chopped tomatoes, rasam powder, chilli powder, salt and mix well.
4. Cook covered till the tomato becomes soft and banana peppers are cooked, stir in between.
5. Adjust the salt and enjoy the yummy banana peppers tomato curry with steamed rice or rotis/puris.
Tuesday, November 9, 2010
Uggani
Uggani, is a simple, yummy dish, prepared using puffed rice, also known as marmaralu/murmure/borugulu and can be served as breakfast or evening snack. This is a popular regional dish in my native place, Ananthapur, in Andhra Pradesh, India. Usually it is served along with mirapakaya/mirchi bajji. Me and my brother love uggani. This is so simple to make and so tasty. My grandmother always makes mirchi bajji as an accompaniment for this dish. She used to send someone to the neighboring town especially to get the long chillies to make the bajjis for us.

Ingredients:(Serves 2-3)
Puffed rice - 200 gm or 1/2 lb
Roasted Chana Dal Powder - 2 tbsp
Onion - 2, sliced length wise
Tomato - 1, large (traditionally, sliced length wise)
Green Chillies - 6
Garlic - 1 clove
Turmeric Powder - 1/4 tsp
Mustard Seeds - 1/2 tsp
Cumin Seeds - 1/4 tsp
Urad Dal - 1/2 tsp
Chana Dal - 1/2 tsp
Curry Leaves - few
Oil - 3 tbsp
Salt - As per taste
Method of Preparation:
1. Grind the green chillies and garlic to a paste.
2. Heat oil in a pan and add mustard seed, after they splutter, add cumin seeds, urad dal, chana dal and curry leaves.
3. Fry for a minute or two and add sliced onions, turmeric powder. Mix well for a minute. Add the ground chilli garlic paste to it.
4. Mix well and fry till the raw smell disappears, then add chopped tomatoes to it and let them soften.
5. Meanwhile, add the puffed rice to a large bowl, half filled with water. Since puffed rice will float on the water, you need to push them so that all of them get soaked in water. After a minute, use both of your hands to take out a handful of the soaked puffed rice from water and squeeze them tightly to get rid of the excess water and transfer them to a dry plate/dish. Repeat the same with the remaining puffed rice.
6. After the tomato gets cooked, add salt, mix well and add the drained puffed rice to the pan.
7. On medium heat, mix well till all the puffed rice gets coated with the onion tomato mixture.
8. Sprinkle the roasted chana dal/pappula/putnala podi on the puffed rice and mix well.
9. Adjust the salt and fry for a minute.
10. Enjoy the hot uggani just like that or accompanied with mirchi bajji.
Sending this to my own event 'Celebrating Regional Cuisine'
Monday, November 8, 2010
Baked Chicken Drumsticks
Previously I had posted a recipe for spicy baked chicken drumsticks, in which I had used yogurt to marinate the chicken. This time I wanted to avoid using yogurt. So, in this recipe I used lemon juice, mustard oil and curry powder. The outcome was super delicious.
 Ingredients:
Chicken Drumsticks - 6
1. Wash the drumsticks, peel off the excess skin if you wish and make deep slits on them.
2. Add the drumsticks to a mixing bowl along with the rest of ingredients and mix well using your hand otherwise add the drumsticks and all ingredients to a ziploc bag and shake well till they get coated evenly with the marinade.
3. Marinate them in the refrigerator for a minimum of 6 hours, best if marinated overnight.
4. Preheat the oven to 400 F, line a baking tray with foil and spray oil on it. Place the drumsticks on the tray and pour the leftover marinade on them.
5. Reduce the oven temperature to 375F and bake the drumsticks for 40 minutes.
6. Turnover the drumsticks and bake for another 30 minutes or till the drumsticks get cooked.
7. Increase the temperature to 425F and bake them until they turn crisp, about 15 to 20 minutes.
8. Enjoy the baked chicken drumsticks warm.
Sending this to 'Hearth n Soul'

Chicken Drumsticks - 6
Mustard Oil - 3 tbsp
Lime Juice - 11/2 tbsp
Chilli Powder - 1/2 tsp
Curry powder - 3/4 tsp
Pepper Powder - 1/4 tsp
Salt - as per taste
Method of Preparation:Pepper Powder - 1/4 tsp
Salt - as per taste
1. Wash the drumsticks, peel off the excess skin if you wish and make deep slits on them.
2. Add the drumsticks to a mixing bowl along with the rest of ingredients and mix well using your hand otherwise add the drumsticks and all ingredients to a ziploc bag and shake well till they get coated evenly with the marinade.
3. Marinate them in the refrigerator for a minimum of 6 hours, best if marinated overnight.
4. Preheat the oven to 400 F, line a baking tray with foil and spray oil on it. Place the drumsticks on the tray and pour the leftover marinade on them.
5. Reduce the oven temperature to 375F and bake the drumsticks for 40 minutes.
6. Turnover the drumsticks and bake for another 30 minutes or till the drumsticks get cooked.
7. Increase the temperature to 425F and bake them until they turn crisp, about 15 to 20 minutes.
8. Enjoy the baked chicken drumsticks warm.
Sending this to 'Hearth n Soul'
Sunday, November 7, 2010
Quick Eggplant Stir Fry
Nothing fancy to write about this recipe :). Made this quick eggplant stir fry last week, when I was rushing to get things done.
 Ingredients:

Eggplant - 1, large, diced
Tomato - 1, large, finely chopped
Onion - 1, medium sized, roughly chopped
Curry Powder - 1 tsp
Chilli Powder - 1/2 tsp
Salt - As per taste
Oil - 1 tbsp
Mustard Seeds - 1/2 tsp
Cumin Seeds - 1/4 tsp
Curry Powder - 1 tsp
Chilli Powder - 1/2 tsp
Salt - As per taste
Oil - 1 tbsp
Mustard Seeds - 1/2 tsp
Cumin Seeds - 1/4 tsp
Method of Preparation:
1. Heat oil in a heavy bottomed vessel, add mustard seeds and cumin seeds. After they start spluttering, add chopped onions and fry till they become transparent.
2. Add chopped tomatoes and fry till they become soft. Add the diced eggplant, fry and cook covered for 5 minutes.
3. Add salt, curry powder, chilli powder and mix well. Cook covered till the eggplant is cooked.
4. Serve the quick eggplant stir fry with steamed rice or rotis.
Friday, November 5, 2010
Celebrating Regional Cuisine (Nov 5th to Dec 31st)
Across the world, there are a number of regions and every region is known for its local cuisine. Based on the geographical location, culture, fresh produce, religion there are a number of regional delicacies. Roughly speaking, India alone has hundreds of regional dishes which our grandmothers and mothers make.
These days, one hardly gets to spend time with grandparents and listen to stories from them, about how they used to make elaborate preparations for each and every festival. I am a Telugu girl, born in Rayalseema, a region in Andhra pradesh. Groundnut/Peanuts are the staple produce in this area and hence, most of our dishes have a hint of groundnut in them. Ragi sankati and natu kodi kura, sajja/sadda rotte are just a few of the regional delicacies of my native place, Ananthapur.
This being my first event, me and my husband thought a lot and we wanted to host an event, in which anyone could participate, irrespective of their background and at the same to provide a platform to share the regional delicacies with one and all. This event also gives an opportunity to highlight the old traditional recipes which are not known to many in the present generation.
"Celebrating Regional Cuisine" - this is the event I am starting.
To participate in the event, post a recipe which is a local/regional delicacy. Also, a small write up on the origin of the dish explaining the background and prominence is appreciated. A few points to be noted down:
1. The recipe can be veg/non veg, include a picture of the dish
2. Mail the following details to worldofsujana@gmail.com
Name of the Dish:
URL of the dish:
Your name:
Blog Name:
3. Non bloggers can directly mail the recipe along with a picture of the dish to the above mentioned id.
4. Please provide a link to this event announcement in your post and also feature the logo of the event.
Please find the round up of this event here.
My 100th Post and 1st Event Announcement !!!!
Happy Diwali to all !!!!
It gives me great pleasure to publish my 100th post on this auspicious day. I could not have done this without the constant support, encouragement and feedback from my husband and all my fellow bloggers. A thank you to all of you fellow bloggers from the bottom of my heart!!!
After much thought, we finally decided to start my first event today.
The event is named "Celebrating Regional Cuisine", the details of the event will follow up in the next post.

Thursday, November 4, 2010
Rasgulla
All my fellow bloggers are posting a lot of recipes for deepavali. The first thing I do every morning is to check out all the beautiful posts of my blogger friends and find out who made which sweet or savory item today :). Today I tried to make badam/almond burfi and it turned out as badam halwa, I reduced the amount of sugar in the original recipe and I guess that was one of the reasons behind burfi turning into halwa :). I do not eat many sweets, so I hardly try my hand at making them, however after looking at all the wonderful posts on sweets, I did not want to give up after the badam burfi incident. So, I tried making rasgulla. I followed the recipe posted by Raks and though my rasgullas did not turn up as good as hers, they were very yummy and we loved them. Thanks for the recipe Raks.
 Ingredients:
Full Fat Milk - 1 litre/4 cups
Lime juice - 3 tbsp
Water - 31/2 cups
Sugar - 2 cups
Rose Water - 1/2 tsp
Method of Preparation:
1. Heat milk in a heavy bottomed pan till it starts boiling. Simmer the heat and add the lime juice and stir it.
2. On low heat, wait till the whey water becomes clear, then turn off the heat.
3. Line a strainer with cheese cloth/muslin cloth and pour the curdled milk into it.
4. Put the strainer with the paneer under cold running water, so that the paneer gets rid of the lime smell and sourness.
5. Squeeze the excess water, by gently squeezing the paneer in the cheese cloth and hang it for 30 minutes or press it under heavy weight, so that all the moisture gets drained.
6. Add the paneer to a mixing bowl and knead it for 10 minutes, until you get a smooth dough.
7. Meanwhile add the water, rose water and sugar to a pressure cooker and let it boil.
8. Make small smooth balls out of the paneer and add them gently into the boiling sugar syrup, one by one.
9. Pressure cook the paneer balls till you get one whistle on low heat. Let it simmer for 5 more minutes on low heat after the first whistle. Then turn off the heat.
10. After the pressure is released, the rasgullas should have doubled in size.
11. Let the rasgullas reach room temperature before refrigerating them.
12. Enjoy the ragullas chilled.
Pala Kova
Pala kova is a sweet found in most of the sweet stalls in Andhra Pradesh. It is very easy to make and I followed the traditional way of reducing whole milk.
 Ingredients:
Full fat milk - 4 cups
Sugar - 1 tsp
Almonds - 2, finely sliced
Ghee/Butter - to grease a plate
Method of Preparation:
1. Add milk to a heavy bottomed, non stick pan and wait till it starts boiling on medium heat.
2. Once it starts boiling, keep stirring, so that the milk does not burn at the bottom of the pan.
3. It will take around 20 to 25 minutes for the milk to reduce.
4. Once the reduced milk starts leaving the sides of the pan, add the sugar, stir for couple of minutes and turn off the heat and pour it on the greased plate.
5. Add the sliced almonds on top of the pala kova.
6. Enjoy the pala kova with friends and family.
Tuesday, November 2, 2010
Vegetarian Chili
Chili is a spicy stew usually made using pepper and meat. Chili with meat is usually known as 'Chili Con Carne' and the vegetarian one is 'Chili Sin Carne'. I first tasted the vegetarian chili in Denver, Colarado, last winter, when I went for my first ski class. During the lunch break, I had a piping hot vegetarian chili, in a bread bowl. It was almost freezing on the top of the mountains and I enjoyed my piping hot chili. I simply loved it. A few days back I was reading an issue of Reader's Digest and came across a black bean chili recipe. Instantaneously it stuck me that I should make my own vegetarian chili. Finally, today I made my own version of chili and it was super yummy. I did not have black beans at home so used black eye beans and white kidney beans, you can use the beans you have at home.
 Ingredients:
Black eye beans - 3/4 cup
White kidney beans - 1/2 cup
Corn kernel - 1/4 cup
Tomato - 1 large
Onion - 1 small, diced
Green Pepper/Capsicum - 1 medium sized, diced
Red Pepper - 1 small, diced
Carrot - 1 medium sized, peeled and diced
Celery - 1 stalk, diced
Garlic - 2 cloves, finely chopped
Chilli powder - 1 tsp
Dried Basil - 1 tsp
Dried Oregano - 1/4 tsp
Oil - 1 tbsp
Salt - As per taste
Method of Preparation:
1. Soak both the beans in water overnight or for a minimum of 4 hours in warm water. If you are running short on time, you can use the canned beans instead or add hot water to the beans in a microwave safe bowl and microwave for 3-5 minutes or just until the beans hydrate and float to the top of the bowl.
2. Make a plus sign on the tomato and place it in a pot of boiling water for a minute or so. Take out the tomato using a slotted spoon and add it to a bowl of cold water. Once tomato cools down, remove the skin and discard it. Finely chop the blanched tomato.
3. Heat oil in a pressure cooker and add the chopped onions, garlic, carrot, celery, green pepper, red pepper and mix well on high heat for 4-5 minutes.
4. Add the diced tomato pieces, chilli powder, corn kernels, salt and mix well. Cook for 3-4 minutes.
5. Add the dried basil and oregano, mix well.
6. Add 3-4 cups of water, mix well, adjust the salt and pressure cook for 3-4 whistles or till the beans become soft.
7. After the pressure is released, mash a part of the beans with a masher. Do not mash the whole thing, we just want the chili to be a little thick. Place the cooker on heat and let it simmer for 3-4 minutes.
8. Serve the piping hot chili in a bread bowl or in a soup bowl and you can even top it with a little cheese.
Monday, November 1, 2010
Quick Mushroom Stir Fry
If you have cleaned and cut mushrooms, this recipe is a breeze through. All you need is a couple of spoons of diced tomatoes and cilantro.
 Ingredients:
Mushrooms - 11/2 cup, cleaned and cut
Tomatoes - 1 small, finely diced
Cilantro - 2 tbsp, finely chopped/crushed
Curry Powder - 1/2 tsp
Cumin Seeds - 1/4 tsp
Salt - As per taste
Oil - 2 tsp
Method of Preparation:
1. Heat oil in a pan and add the cumin seeds. Add the chopped tomatoes and salt and cook till they become soft.
2. Add the chopped mushrooms, curry powder and cook till the mushrooms are half done.
3. Add the crushed cilantro, mix well and cook till the water from the mushrooms evaporates.
4. Serve the quick mushroom stir fry with rotis and enjoy.
Subscribe to:
Posts (Atom)
LinkWithin
