Showing posts with label Snack. Show all posts

Wednesday, January 5, 2011

Brown Rice Crispy Treats

I love eating puffed brown rice. I can eat them without adding any thing. I have been thinking for a long time about make crispy treats using them and marshmallows. Finally today I made them and lovedddddddd the yummy crispy treats. In order to be guilt free, I avoided adding butter and used vegetable oil instead. Puffed brown rice are easily available in the cereal section in Walmart.
Ingredients:
Puffed Brown Rice - 3 cups
Mini Marshmallows - 2 cups
Oil - 3 tbsp + little to grease your hand
Almonds - 6, sliced finely
Pumpkin Seeds - few (optional)
Nutmeg Powder - a large pinch

Method of preparation:
1. Add some water to a large heavy bottomed vessel and let the water simmer. Grease a square baking tray with a little oil and keep aside.
2.Add the puffed brown rice to a large baking sheet or an oven proof bowl and bake them for 5 minutes at 400F.
3. Add oil, marshmallows and  nutmeg powder to a mixing bowl, that can be placed on top of the simmering water.
4. Stir until the marshmallows melt. Then quickly add the toasted puffed brown rice and sliced almonds to the mixing bowl and stir well using a spatula.
5. Transfer this mixture to the greased baking tray. Coat your hands with a little oil and spread the mixture evenly in the prepared tray. Sprinkle the pumpkin seeds on top, if using
6. After the brown rice crispy treats cool down completely, cut them into desired shapes and store in an airtight container.

Tuesday, November 9, 2010

Uggani

Uggani, is a simple, yummy dish, prepared using puffed rice, also known as marmaralu/murmure/borugulu and can be served as breakfast or evening snack. This is a popular regional dish in my native place, Ananthapur, in Andhra Pradesh, India. Usually it is served along with mirapakaya/mirchi bajji. Me and my brother love uggani. This is so simple to make and so tasty. My grandmother always makes mirchi bajji as an accompaniment for this dish. She used to send someone to the neighboring town especially to get the long chillies to make the bajjis for us.

Ingredients:(Serves 2-3)
Puffed rice - 200 gm or 1/2 lb
Roasted Chana Dal Powder - 2 tbsp
Onion - 2, sliced length wise
Tomato - 1, large (traditionally, sliced length wise)
Green Chillies - 6
Garlic - 1 clove
Turmeric Powder - 1/4 tsp
Mustard Seeds - 1/2 tsp
Cumin Seeds - 1/4 tsp
Urad Dal - 1/2 tsp
Chana Dal - 1/2 tsp
Curry Leaves - few
Oil - 3 tbsp
Salt - As per taste

Method of Preparation:
1. Grind the green chillies and garlic to a paste.
2. Heat oil in a pan and add mustard seed, after they splutter, add cumin seeds, urad dal, chana dal and curry leaves.
3. Fry for a minute or two and add sliced onions, turmeric powder. Mix well for a minute. Add the ground chilli garlic paste to it.
4. Mix well and fry till the raw smell disappears, then add chopped tomatoes to it and let them soften.
5. Meanwhile, add the puffed rice to a large bowl, half filled with water. Since puffed rice will float on the water, you need to push them so that all of them get soaked in water. After a minute, use both of your hands to take out a handful of the soaked puffed rice from water and squeeze them tightly to get rid of the excess water and transfer them to a dry plate/dish. Repeat the same with the remaining puffed rice.
6. After the tomato gets cooked, add salt, mix well and add the drained puffed rice to the pan.
7. On medium heat, mix well till all the puffed rice gets coated with the onion tomato mixture.
8. Sprinkle the roasted chana dal/pappula/putnala podi on the puffed rice and mix well.
9. Adjust the salt and fry for a minute.
10. Enjoy the hot uggani just like that or accompanied with mirchi bajji.

Sending this to my own event 'Celebrating Regional Cuisine'

Monday, November 8, 2010

Baked Chicken Drumsticks

Previously I had posted a recipe for spicy baked chicken drumsticks, in which I had used yogurt to marinate the chicken. This time I wanted to avoid using yogurt. So, in this recipe I used lemon juice, mustard oil and curry powder. The outcome was super delicious.
Ingredients:
Chicken Drumsticks - 6
Mustard Oil - 3 tbsp
Lime Juice - 11/2 tbsp
Chilli Powder - 1/2 tsp 
Curry powder - 3/4 tsp
Pepper Powder - 1/4 tsp
Salt - as per taste

Method of Preparation:
1. Wash the drumsticks, peel off the excess skin if you wish and make deep slits on them.
2. Add the drumsticks to a mixing bowl along with the rest of ingredients and mix well using your hand otherwise add the drumsticks and all ingredients to a ziploc bag and shake well till they get coated evenly with the marinade.
3. Marinate them in the refrigerator for a minimum of 6 hours, best if marinated overnight.
4. Preheat the oven to 400 F, line a baking tray with foil and spray oil on it. Place the drumsticks on the tray and pour the leftover marinade on them.
5. Reduce the oven temperature to 375F and bake the drumsticks for 40 minutes.
6. Turnover the drumsticks and bake for another 30 minutes or till the drumsticks get cooked.
7. Increase the temperature to 425F and bake them until they turn crisp, about 15 to 20 minutes.
8. Enjoy the baked chicken drumsticks warm.


Sending this to 'Hearth n Soul' 
hearthandsoulgirlichef

Thursday, November 4, 2010

Rasgulla

All my fellow bloggers are posting a lot of recipes for deepavali. The first thing I do every morning is to check out all the beautiful posts of my blogger friends and find out who made which sweet or savory item today :). Today I tried to make badam/almond burfi and it turned out as badam halwa, I reduced the amount of sugar in the original recipe and I guess that was one of the reasons behind burfi turning into halwa :). I do not eat many sweets, so I hardly try my hand at making them, however after looking at all the wonderful posts on sweets, I did not want to give up after the badam burfi incident. So, I tried making rasgulla. I followed the recipe posted by Raks and though my rasgullas did not turn up as good as hers, they were very yummy and we loved them. Thanks for the recipe Raks.
Ingredients:
Full Fat Milk - 1 litre/4 cups
Lime juice - 3 tbsp
Water - 31/2 cups
Sugar - 2 cups
Rose Water - 1/2 tsp

Method of Preparation:
1. Heat milk in a heavy bottomed pan till it starts boiling. Simmer the heat and add the lime juice and stir it.
2. On low heat, wait till the whey water becomes clear, then turn off the heat.
3. Line a strainer with cheese cloth/muslin cloth and pour the curdled milk into it.
4. Put the strainer with the paneer under cold running water, so that the paneer gets rid of the lime smell and sourness.
5. Squeeze the excess water, by gently squeezing the paneer in the cheese cloth and hang it for 30 minutes or press it under heavy weight, so that all the moisture gets drained.
6. Add the paneer to a mixing bowl and knead it for 10 minutes, until you get a smooth dough.
7. Meanwhile add the water, rose water and sugar to a pressure cooker and let it boil.
8. Make small smooth balls out of the paneer and add them gently into the boiling sugar syrup, one by one.
9. Pressure cook the paneer balls till you get one whistle on low heat. Let it simmer for 5 more minutes on low heat after the first whistle. Then turn off the heat.
10. After the pressure is released, the rasgullas should have doubled in size.
11. Let the rasgullas reach room temperature before refrigerating them.
12. Enjoy the ragullas chilled.

Pala Kova

Pala kova is a sweet found in most of the sweet stalls in Andhra Pradesh. It is very easy to make and I followed the traditional way of reducing whole milk.
Ingredients:
Full fat milk - 4 cups
Sugar - 1 tsp
Almonds - 2, finely sliced
Ghee/Butter - to grease a plate

Method of Preparation:
1. Add milk to a heavy bottomed, non stick pan and wait till it starts boiling on medium heat.
2. Once it starts boiling, keep stirring, so that the milk does not burn at the bottom of the pan.
3. It will take around 20 to 25 minutes for the milk to reduce.
4. Once the reduced milk starts leaving the sides of the pan, add the sugar, stir for couple of minutes and turn off the heat and pour it on the greased plate.
5. Add the sliced almonds on top of the pala kova.
6. Enjoy the pala kova with friends and family.

Saturday, October 30, 2010

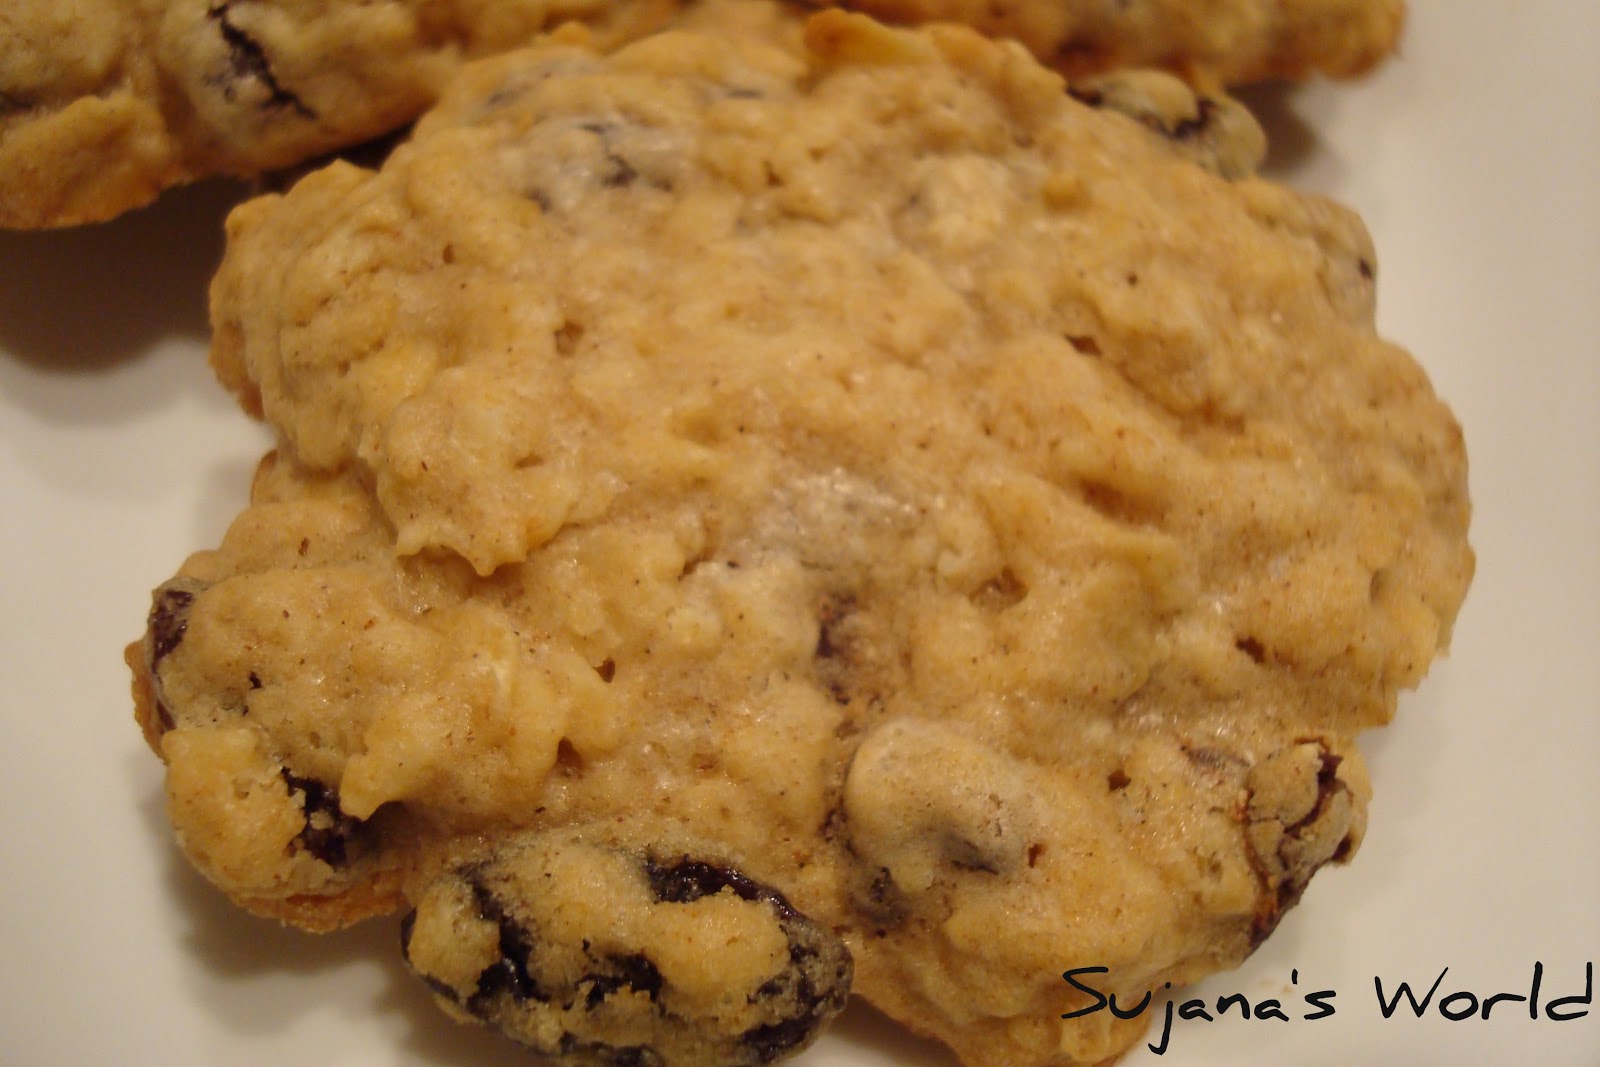
Chocolate Chip Oatmeal Cookies

My dearest hubby had a Halloween party in his office this week and wanted me to make him something for that. I baked chocolate chip oatmeal cookies for him and they turned out pretty good. The preparation was pretty easy and I added a few raisins to the cookie dough as well. The bake time for each batch was around 10-12 minutes.
Ingredients:(Makes about 25-30 cookies)
All purpose flour - 3/4 cup
Butter - 1 stick/8 tbsp, softened
Brown Sugar - 3/4 cup
Rolled Oats - 11/2 cups
Chocolate Chips - 1 cup
Egg - 1
Vanilla Extract - 1 tsp
Baking Soda - 1/2 tsp
Cinnamon Powder - 1/2 tsp
Raisins - 1/2 cup(Optional)
Salt - 1/4 tsp

Method of Preparation:
1. Preheat oven to 350F and line the baking sheet with parchment paper. In a mixing bowl add butter and sugar and beat them till creamy.
2. Add the vanilla extract and egg and beat till a smooth mixture is formed. Stir in the flour, cinnamon powder, baking soda and salt.
3. Add the oatmeal and chocolate chips and raisins, if using to the mixture and mix well. Drop the cookie dough using a tablespoon onto the baking sheets. Flatten the cookies slightly using the back of a fork or a spatula.
4. If you prefer chewy cookies, then bake for 10 minutes or until golden brown and still moist else bake for 12 minutes.
5. Cool the cookies and store them in air tight container. Enjoy the chocolate chip oatmeal cookies with your friends and family.

Sending this to Champa's 'Bake-off' event and Akila's 'DNSW:C'

Thursday, October 28, 2010

Bourbon Biscuits

Bourbon biscuits are loved by many and my hubby is one of those. He likes munching on these biscuits and enjoys them with his cup of coffee. Few days back I was going through a book on chocolate and found a very easy recipe for making the bourbon cookies. Finally today, I took time out to try the recipe and make the bourbon biscuits. The biscuits came out very well, the only thing missing was the sugar granules on top, next time I bake them, I will add the sugar granules on top before baking the biscuits. The original recipe did not have vanilla essence, however I feel that addition of a little vanilla extract will make them taste even better.
Ingredients:
All purpose flour - 1 cup
Cocoa Powder - 3 tbsp
Baking Powder - 1/2 tsp
Unsalted Butter - 4 tbsp, softened
Granulated Sugar - 1/4 cup
Egg - 1
Vanilla Extract - 1/4 tsp

For the Filling:
Hot water/Strong brewed coffee - 3 tbsp
Melted Semi sweet chocolate - 4 tbsp
Sugar - 1/2 cup

Method of Preparation:
1. Preheat the oven to 325F. Line the baking sheet with parchment paper or foil.
2. In a bowl combine flour, baking powder and cocoa powder. Mix them well and sift the mixture using a sieve.
3. In a mixing bowl, beat the butter and sugar and then beat in the egg and vanilla essence. Stir in the dry ingredients until the mixture turns into a dough.
4. Knead the dough a little and place it on a floured surface. Sprinkle a little flour on top of the dough and roll it to form a 10 inch square.
5. Cut the dough into strips 21/2 inch in width. Then cut each strip into 1 inch pieces. Approximately you should have 40 1 X 21/2 inch rectangles.
6. Arrange the cookies on the baking sheet and using a fork, pierce each biscuit/cookie about four times. Bake them for around 20 minutes or until they become crisp and dry
7. Cool the biscuits in the baking sheet.
8. For the filling, mix the coffee or water into the melted chocolate and add the sugar. Mix well. Turn half the cookies over so that the bottom side is facing up. Spread a little filling on them. Place a cookies on top of the ones with the filling. Leave the cookies until the filling sets and hardens a little bit.
9. Enjoy the bourbon biscuits/cookies with coffee or tea.

Note: Do not over bake the cookies, else you will end up with hard biscuits.

Sending this recipe to Champa's 'Bake-off' event.

Wednesday, October 27, 2010

Roasted Garlic Guacamole

Making guacamole is probably the easiest and quickest. All you need is ripe avocados and within minutes you can dish up a yummy guacamole. Today I tried adding roasted garlic to the guacamole and the outcome was so yummy that my better half finished the whole bowl of guacamole with chips.
Ingredients:
Ripe Avocados - 2
Garlic - 2 cloves, unpeeled
Tomato - 1 small, finely chopped
Onion - 1/2 small sized, finely chopped
Cilantro - 2 tbsp, finely chopped
Paprika/Chilli Powder - 1/4 tsp
Lime Juice - 1 tsp
Salt - As per taste

Method of Preparation:
1. Heat a small pan, add the garlic cloves with the peel on. Roast them until the garlic turns soft and black spots are developed on the them. Roast them for around 10 to 15 minutes, turning around in between.
2. Let the garlic cool down, remove the peel. Add the roasted garlic to a mortar and grind to a smooth paste.
3. Cut around the avocados, then twist the avocado halves and pull them apart. Remove the seed and scoop out the avocado flesh into a bowl. 
4. Add the roasted garlic paste, chopped cilantro, lime juice, paprika and mix well, coarsely mashing the avocado flesh. Add salt and chopped tomatoes, mix.
5. Wash the chopped onions in water, drain the water and add them to the avocado mixture.
6. Mix well, adjust the salt and enjoy the roasted garlic guacamole with chips.

Friday, October 15, 2010

Baked Black Eyed Peas (Alasandalu/Bobbarlu)

Black eyed peas are referred to as 'alasandalu' or 'bobbarlu', in Telugu. Deep fried black eyed peas are a simple and tasty snack, that one cannot stop munching on. These baked black eyed peas taste almost as the deep fried black eyed peas, without the extra grease. I have kept the recipe fairly simple by just adding very little salt. You can play around with the spices to enhance the flavor.
Ingredients:
Dried Black eyed peas - 1 cup
Oil - 1 tsp
Salt - as per taste

Method of Preparation:
1. Soak the black eyed peas in water overnight. Drain the water and rinse with fresh water.
2. Drain all the water, add oil and salt to it. Mix well(preferably using your hand)
3. Preheat the oven to 400F. Line the baking sheet with foil  and spread the black eyed peas evenly on it.
4. Bake the black eyed peas for 10 minutes, take out the tray and turn around the black eyed peas using a spatula.
5. After 15 minutes, switch off the oven, take out the tray and turn around the black eyed peas once again. Place the baking tray back in the oven and let it stand there until the oven cools down.
6. Adjust the salt and enjoy the crispy baked black eyed peas.

Monday, October 11, 2010

No Bake Choco-Oat Cookies

Do you have old fashioned oats, cocoa powder and 5 minutes at hand? If the answer is yes, then you can easily make these no bake choco-oat cookies.
Ingredients:
Old Fashioned Rolled Oats - 1 cup
Brown Sugar - 3 tbsp
Honey - 1 tbsp
Butter - 3 tbsp
Unsweetened Cocoa powder - 3 tbsp
Milk - 1/4 cup
Walnuts - 2 tbsp, finely chopped
Raisins - 1 tbsp

Method of Preparation:
1. In a small vessel add brown sugar, honey, butter, cocoa powder, milk and mix well. Bring the mixture to boil on medium heat, stirring frequently. Boil for 3 minutes or until the mixture thickens a little.
2. Remove the vessel from heat and add the chopped walnuts, raisins and oats to it. Mix well and let the mixture cool a little bit before making small rounds of the mixture and place them on wax paper or aluminium foil.
3. Let the no bake choco-oat cookies cool down completely and become firm before storing them in a tightly covered box.

Sending this recipe to 'Anyone can cook - 3' being hosted by Ayeesha 
No Bake Choco-Oat Cookies on Foodista

Thursday, September 23, 2010

Home Made Caramel Pop corn

I love pop corn and few weeks back bought caramel corn at a local shop. I loved the taste of it, however, it was too sweet for me. Hence, I wanted to make caramel corn or pop corn at home. Went through a lot of recipes posted online and most of them were using corn syrup. I developed my own recipe without corn syrup and the resultant taste was very close to the store bought one, only the color was a shade lighter when compared to the store bought caramel corn.
Ingredients:
Freshly popped corn - 2 large cups(you can refer to the home made pop corn post)
Brown Sugar - 1/4 cup
Butter - 2 tbsp
Honey - 1 tbsp
Salt - 1/8 tsp
Granulated Sugar - 2 tbsp
Water - 21/2 tbsp
Vanilla Essence - few drops
Baking Soda - a large pinch

Method of Preparation:
1. Add the salt to freshly popped corn and toss well.
2. Preheat the oven to 250 F.
3. In a small pan add the butter, brown sugar, granulated sugar, honey and water. On medium heat, mix the contents in the pan until they dissolve and start boiling.
4. Let the mixture boil for 3-5 minutes on medium to low heat, keep stirring in between.
5. Take the caramel off the hat and add the vanilla essence and baking soda, mix well. Once you add the baking soda, the mixture becomes foamy.
6. Place the pop corn in a wide bowl and slowly pour the caramel all over the corn. Toss the pop corn so that most of the pop corn gets coated with the caramel mixture or use a spatula to do the same.
7. Line a baking sheet with parchment paper or aluminium foil and spread the coated pop corn evenly on the sheet.
8. Place the baking tray in the oven for 6-8 minutes, take out the baking tray, mix the pop corn well and place the tray back in the oven for 6-8 minutes.
9. Once the caramel starts solidifying, take out the baking tray and transfer the caramel corn onto a wax paper or aluminium foil, placed on the counter top. Try to break the corn if any are stuck, before placing them on the foil.
10. Let the corn cool down completely, before transferring them into an air tight container.
11. Enjoy the home made caramel pop corn with your family and friends.

Sunday, September 19, 2010

Spicy Puffed Rice

This is one of those recipes which is very close to my heart. Me and my brother used to love these whenever our mom or granny used to make them. The flavor is so heavenly that, even today I cannot stop myself from munching these. As soon as I prepared the spicy puffed rice today, even before publishing the post, I was busy emptying a big bowl of spicy puffed rice :)
Ingredients:
Puffed Rice - 2 cups
Garlic - 3 large cloves
Curry Leaves - 6
Cumin Seeds - 1/4 tsp
Chilli powder/Paprika - 1/2 tsp
Salt - 1/4 tsp
Raw Peanuts - a handful
Roasted Chana Dal - a handful
Turmeric Powder - 1/4 tsp
Oil - 4 tbsp

Method of Preparation:
1. In a small mortar, add the cumin seeds, salt and chilli powder. Crush them slightly using a pestel so that the cumin seeds get crushed roughly.
2. Add the curry leaves and crush them too.
3. Add the garlic cloves and crush them finely.
4. In a deep non stick dish, heat the oil and add raw peanuts. On medium flame, cook for a minute or two till the peanuts get cooked, add the roasted chana dal and turmeric powder. Mix well.
5. Now add the ground mixture on low heat and mix well so that no lumps of the mixture remain. 
6. Mix well for a minute on low heat, till the raw smell of garlic disappears. 
7. Now add the puffed rice and on very low heat, mix them in such a way that each and every puffed rice gets coated with the mixture in the dish.
8. Take off the heat and transfer the spicy puffed rice into a dish or container, close the lid after the spicy puffed rice cools down.

Note: Always try this recipe in a small batch first, so that you do not end up with burnt puffed rice. 

Sunday, September 12, 2010

Aloo Tikki Chat

Aloo tikki chat... the name itself rings a lot of bells in many of the Indians. Such is the popularity of this chat. The various components of this chat include aloo tikki, choley, green chutney and tamarind date chutney. Here are the recipes to the rest of components.

Ingredients for Aloo Tikki(Makes around 10-12 tikkis)
Potatoes - 4 medium sized(boiled and peeled)
Chilli Powder - 1/2 tsp
Coriander Powder - 1/4 tsp
Roasted Cumin Powder - 1/2 tsp
Salt - As per taste
Oil - 1 tbsp

Method of Preparation:
1. Mash the potatoes and add the rest of ingredients. Mix well.
2. Divide the potato mixture into large lemon sized balls.
3. Flatten each ball into a round shape of around half inch thickness.
4. Heat a non stick pan and apply a little oil. Place the prepared aloo tikkis on the pan. On medium heat, let the tikkis turn golden brown before turning them over.
5. Turn them over and pour little oil on the pan.
6. Wait till the tikkis turn golden brown, switch of the heat and let the tikkis rest on the hot tava.
7. If the tikkis turn out very soft, then let them cool and reheat them once again. This way the tikkis tend to be crisper for a longer period.

Ingredients for Choley:
Chickpeas/Chana/Garbanzo Beans - 1 can(Drain the liquid and wash the beans couple of times before using)
(Instead of canned chana, you can also use dried chana. Soak them overnight and boil them)
Onion - 1 large sized, finely chopped
Tomatoes - 2 medium sized, finely chopped
Coriander Powder - 1 tsp
Roasted Cumin Powder - 1/2 tsp
Chilli Powder - 1 tsp
Garam Masala - 1/2 tsp
Pudina/Mint Leaves - 4-5, finely chopped
Coriander/Cilantro Leaves - 1/2 tsp, finely chopped
Salt - As per taste
Oil - 1 tbsp

Method of Preparation:
1. Heat oil in a pan and add the chopped onions. Fry them till they turn golden brown.
2. Add the chopped tomatoes and fry for 2-3 minutes.
3. Add chilli powder, coriander powder, cumin powder and mix well, till the raw smell disappears.
4. Add the chana and 2 cups of water, mix well and let the mixture boil.
5. Add the garam masala, salt, chopped mint and coriander. Mix well.
6. Now transfer the contents to a pressure cooker and cook for 2-3 whistles.
7. Choley for aloo tikki chat is ready.

Ingredients for Green Chutney:
Coriander/Cilantro Leaves - 3 tbsp, roughly chopped
Green Chillies - 2-3, roughly chopped
Lime juice - 1 tsp
Yogurt/Curd - 1 tbsp
Salt - As per Taste

Method of Preparation:
1. Add all the ingredients to a blender and blend to a smooth puree.
2. Green chutney for aloo tikki chat is ready.

Ingredients for assembling Aloo Tikki Chat:
Onion - 1 large sized, finely chopped
Coriander/Cilantro Leaves - 2 tbsp, freshly chopped

Method of Plating:
1. Take a bowl, place one or two hot aloo tikkis on the bottom.
2. Pour some choley on top of it.
3. Add a tablespoon of chopped onions on top of it.
4. Pour 2 teaspoons of the green chutney on top of it.
5. Pour 2 teaspoons of the date tamarind chutney on top of it.
6. Finally add a little more chopped onion and chopped coriander leaves.
7. Enjoy the amazing aloo tikki chat.

Friday, September 10, 2010

Tangy Spicy Murmure(Puffed Rice) Chat

Wondering how different is a murmure chat from the usual bhel puri? In my recipe, I have avoided using the green chutney and the sweet tamarind chutney. Instead, I have used chilli powder and lemon juice. This recipe is very simple, here it goes..
Ingredients:
Puffed Rice/Bhel/Murmure - 2 large cups
Onion - 1 medium sized, finely chopped
Tomato  - 1 medium sized, finely chopped
Coriander/Cilantro leaves - 2 tbsp, finely chopped
Mint/Pudina leaves - 10, finely chopped
Boondi - 3 tbsp(Optional, I used Chinni's Kara Boondi, purchased at Indian Grocery Store)
Sev - 2 tbsp(Optional, I used Chinni's Om Podi, purchased at Indian Grocery Store
Roasted Peanuts - 1/4 tsp
Lime Juice - 2 tsp
Chilli Powder - 11/2 tsp
Salt - As Per Taste
Turmeric Powder - 1/4 tsp
Oil - 1 tbsp

Method of Preparation:
1. Heat oil in a big pan and add turmeric powder and half teaspoon chilli powder, mix well for few seconds on medium heat. Add the puffed rice to it and mix well in such a way that all the puffed rice gets coated with turmeric powder and oil mixture.
2. Keep stirring for 2 minutes on medium heat and take off from heat. This step ensures that the puffed rice turns crispy.
3. In a small bowl add the chopped onions, chopped tomatoes, chilli powder, chopped coriander powder, chopped mint, lime juice and salt. Mix well.
4. Add this mixture to the puffed rice just before serving and mix well.
5. Top with roasted peanuts, boondi and sev.
6. Serve the tangy spicy murmure chat immediately, else the puffed rice might turn soggy.

Friday, August 13, 2010

Chana Zor Garam

Looks like it is going to rain today, so I wanted to have a snack along with a cup of hot tea. Previously I had heard a lot about chana zor garam, but never really attempted to make it. So, today I took time to find more about this popular street side Indian snack. I found many versions of this popular snack and finally decided on doing it in an oven unlike the traditional method of deep frying. Here goes the recipe of chana zor garam along with a famous Hindi song related to it!!

Ingredients:
Black Chana/Chickpeas/Garbanzo beans - 1 cup(Can even use kabuli chana)
Oil - 11/2 tsp
Chilli Powder/Paprika - 1/4 tsp
Lemon juice - 1/4 tsp
Onion - 2 tbsp, finely chopped
Cumin Powder - a pinch
Salt - As per taste

Method of Preparation:
1. Soak the chana overnight. Drain the water and place the chana on a kitchen towel to remove the excess water. Ensure that the chana is dry.
2. Preheat the oven to 425 F. Line a baking sheet with aluminium foil.
3. Add oil and a little bit of salt to the chana, mix well.
4. Spread the chana on the baking sheet and bake for 7-10 minutes, depending on the chana you use. I baked for 7 minutes.
5. Take out the baking tray mix the chana once and place it in the oven for another 4-7 minutes. The chana should be crispy from outside and soft inside.
6. Meanwhile, in a bowl add the chopped onions, salt, chilli powder, cumin powder, lemon juice and mix well.
7. Now add the baked chana to this mix and toss well and enjoy your Chana Zor Garam

Variation:
1. You can deep fry the chana instead of baking
2. You can use green chillies instead of chilli powder
3. You can even add chopped tomatoes and coriander leaves
4. You can omit the onions

Tuesday, August 3, 2010

Broiled Cauliflower

Cauliflower florets when burnt slightly taste great. Today I applied a marinade on the cauliflower florets and stuck them to skewers. First I baked them at a high temperature and then put them under the broiler for few minutes until the florets were slightly charred.

Ingredients:
Cauliflower florets - 1 big cup (approximately one third of a whole cauliflower)
Skewers - 2-3 (soak them in water for 15 minutes, else they might get burned)

For the Marinade:
Thick Curd - 4 tbsp
Turmeric powder - 1/4 tsp
Chilli Powder - 1/2 tsp
Ginger Powder - 1/4 tsp (can also use freshly grated ginger instead of powder)
Cumin Powder - 1/2 tsp
Coriander Powder - 1/2 tsp
Mint Powder - 1/4 tsp
Salt - As per taste

Method of Preparation:
1. Wash the cauliflower florets and pat dry them.
2. In a bowl mix all ingredients for the marinade.
3. Coat each floret with the marinade and press it against the skewer.
4. Preheat the oven to 450 F.
5. Line a baking sheet or tray with aluminium foil and spray a little cooking spray on the foil or apply oil directly on the foil.
6. Place the skewers with the cauliflower florets on the foil and bake them for 20 minutes
7. Remove the baking try from the oven and place the tray under the broiler for 5 minutes.
8. Take the baking tray out, turn the skewers around and broil for another 5 minutes or until the cauliflower florets get enough charred.
9. Serve hot with onion rings and lemon wedges.


This is my entry to the event 'Side dishes From India(Other than Dals/Subzis)', being hosted by Suma.

Also sending it to 'Two For Tuesdays' 
TwoforTuesdays@girlichef

Saturday, July 31, 2010

Pop Corn at Home


The word pop corn brings to mind the microwaveable packets which we pop into the microwave and have instant pop corn ready. However, it is very simple to make pop corn at home, from scratch. All you need is dried corn kernels, which are readily available in packets in most of the grocery stores, Indian stores and Mexican stores.


Ingredients:
1/4 cup cooking oil(just enough to cover the bottom of the vessel)
3/4 cup corn kernels
Salt - 1/4 tsp
Chilli Powder - 1/8 tsp

Method of Preparation:
1. Heat the oil on high heat in a big non stick vessel or a heavy bottomed pan.
2. Add the corn kernels and just shake the vessel once, this ensures that all the corn evenly settles in the pan.
3. Cover the pan with a lid in such a way that the steam escapes when the corn starts popping.
4. Once the corn starts popping, reduce the heat to a little over medium.
5. Once the corn stops popping, remove the vessel from heat.
6. Add the salt and chilli powder to the pop corn and toss it.

Variation
1. Add a little turmeric powder to the oil, which imparts yellow color to the pop corn.
2. You can also add pepper powder instead of chilli powder.


LinkWithin

Related Posts with Thumbnails